
For just under 5 minutes you are taken on a wild ride - blazing through wooded forests on a mountain bike, standing inside of massive, Australian barrels with Kelly Slater, and walking out on flakey rock fingers, hoping that they hold long enough for you to huck a giant gainer over the valley floor. It's vicariously visceral and it all happens in the blink of an eye, but behind that experience there are countless hours of meticulous problem solving. Creating a GoPro launch video can be unpredictable and challenging, but there are formulas that have surfaced over a handful of iterations that shine an interesting light on how mathematical and precise the creative process actually is. I have broken these ideas down into 3 simple formulas that I have personally found to be very helpful when approaching a large scale video project such as a GoPro launch reel.
Formula #1 - Create a palette first
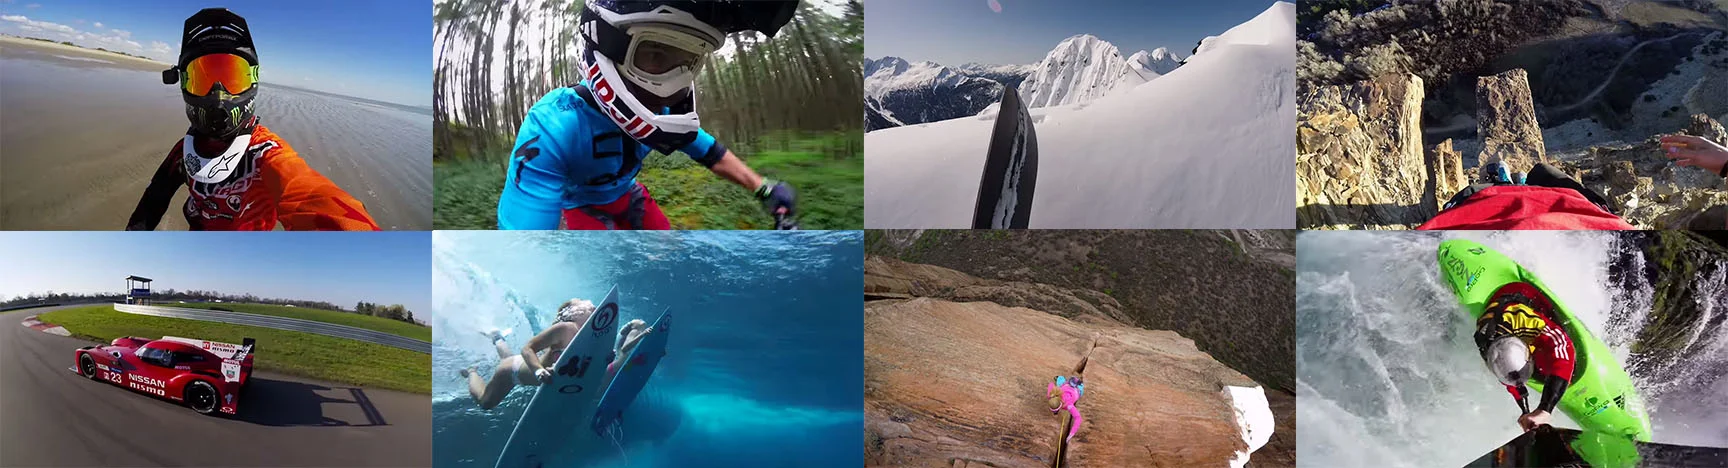
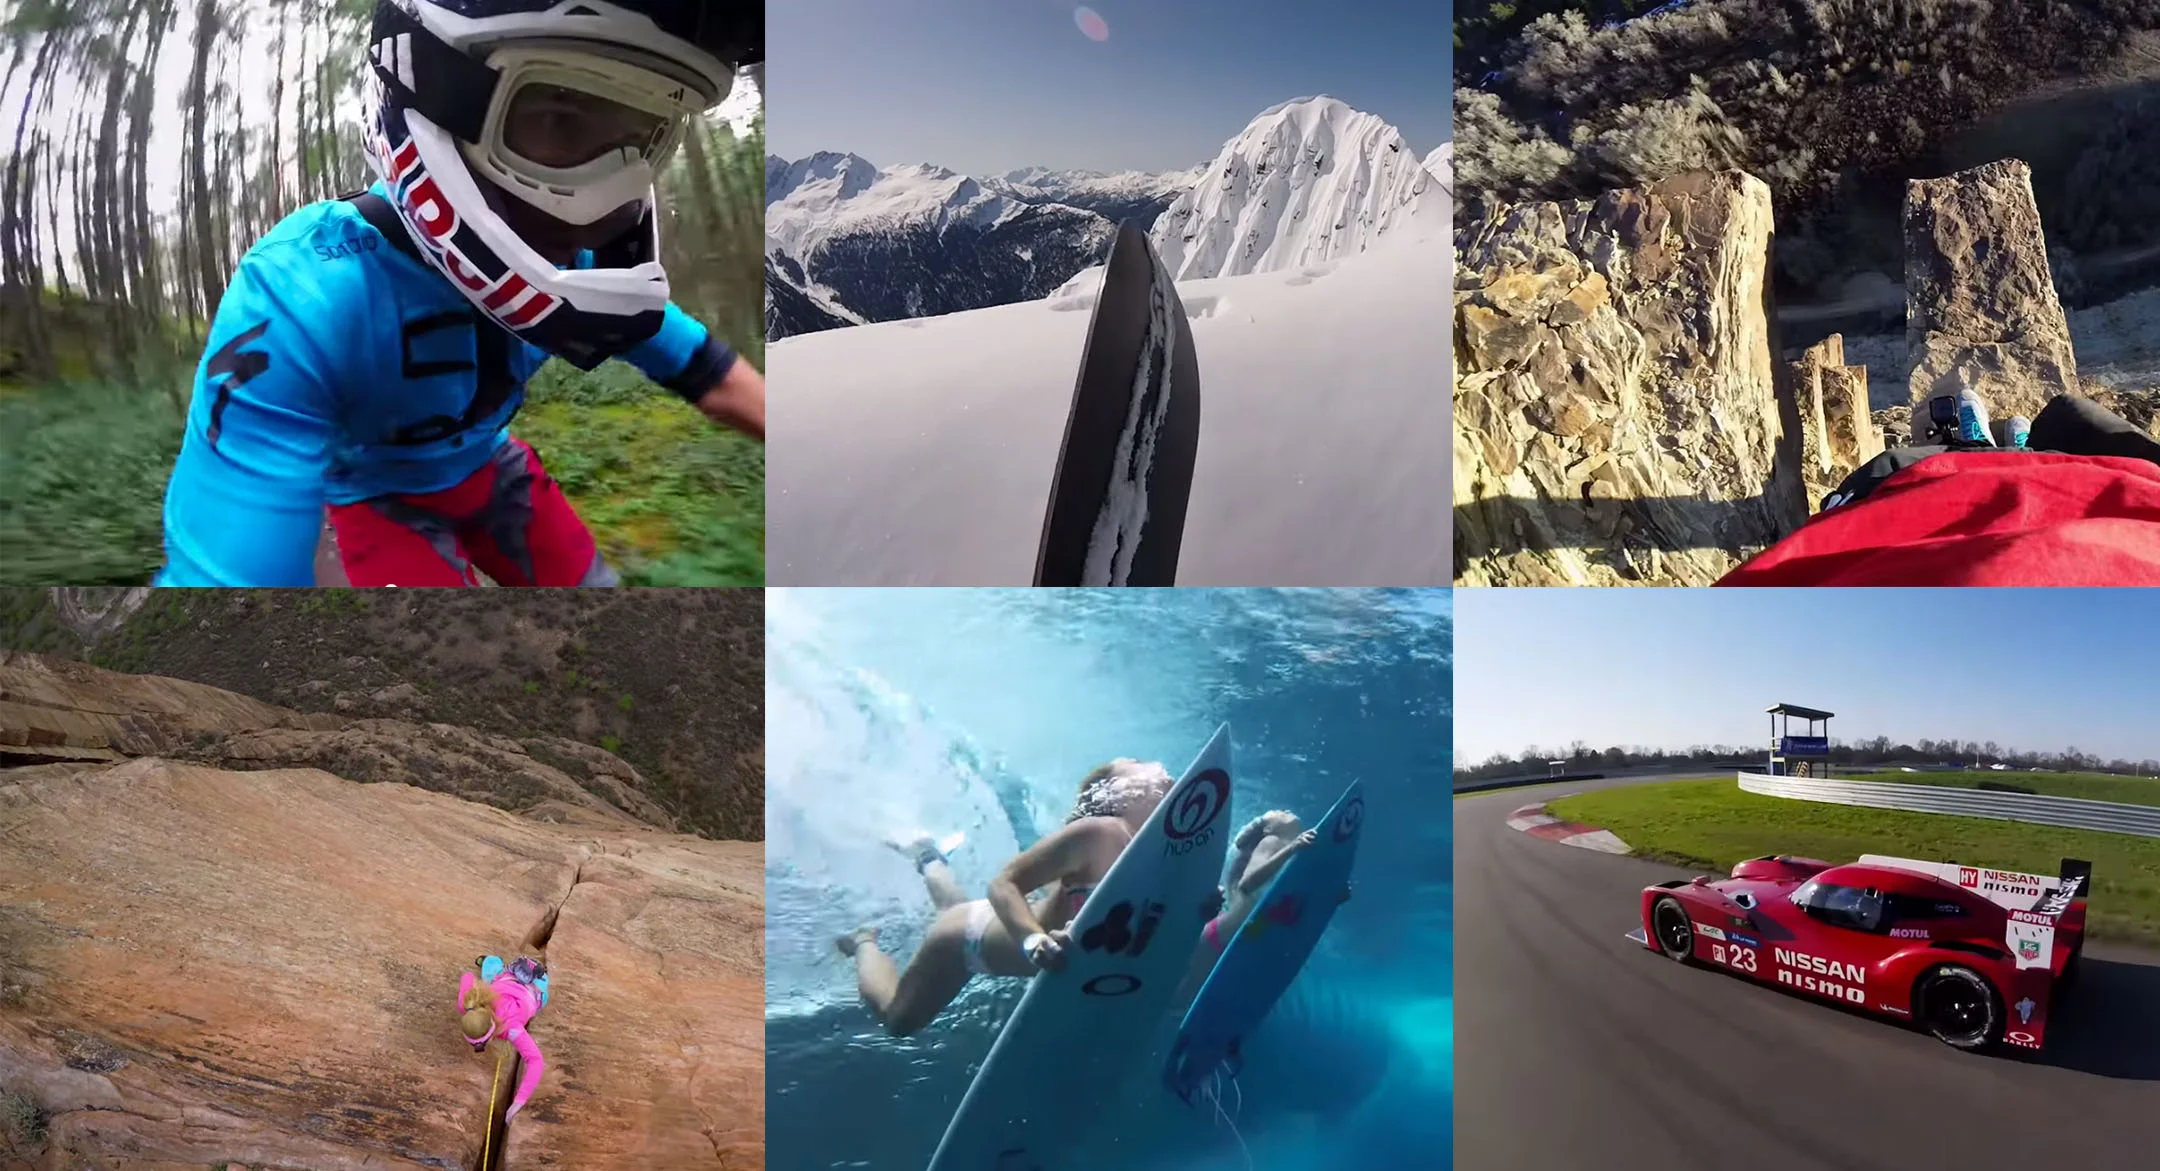
Figure 1
When planning which stories we want to tell in the reel, we try to think about it backwards, attempting to envision what we want the end product to look like as a whole, and most importantly making sure that there is a nice balance to the color palette. This seems like a minute detail, but in fact it's very important. If the balance is achieved correctly, the viewer shouldn't really notice; it's when the balance is off that it becomes a problem. To give you an example, if there are 3-4 shots of very dry, red environments such as the rock climbing scene (see figure 1), we will be sure to have a refreshing blue or green shot follow, to sort of "cleanse" the viewer's palate. Ideally we want to have a very colorful pool of footage to work with, not only to have an aesthetically pleasing film, but to be able to use the emotions evoked from the different environments to drive the storyline. When we sit down in the early stages of pitching, the conversation is centered around which, in this case 8 environments, will look the best and compliment each other. Only then do we get into specifics (athletes, location, etc). If it turns out one of the pitches doesn't work for logistic reasons, we can sub it out for something visually similar, and our palette isn't drastically altered. Creating this balance happens very early in the process, otherwise it can mean a costly reshoot.
Formula # 2 - Efficient Shooting
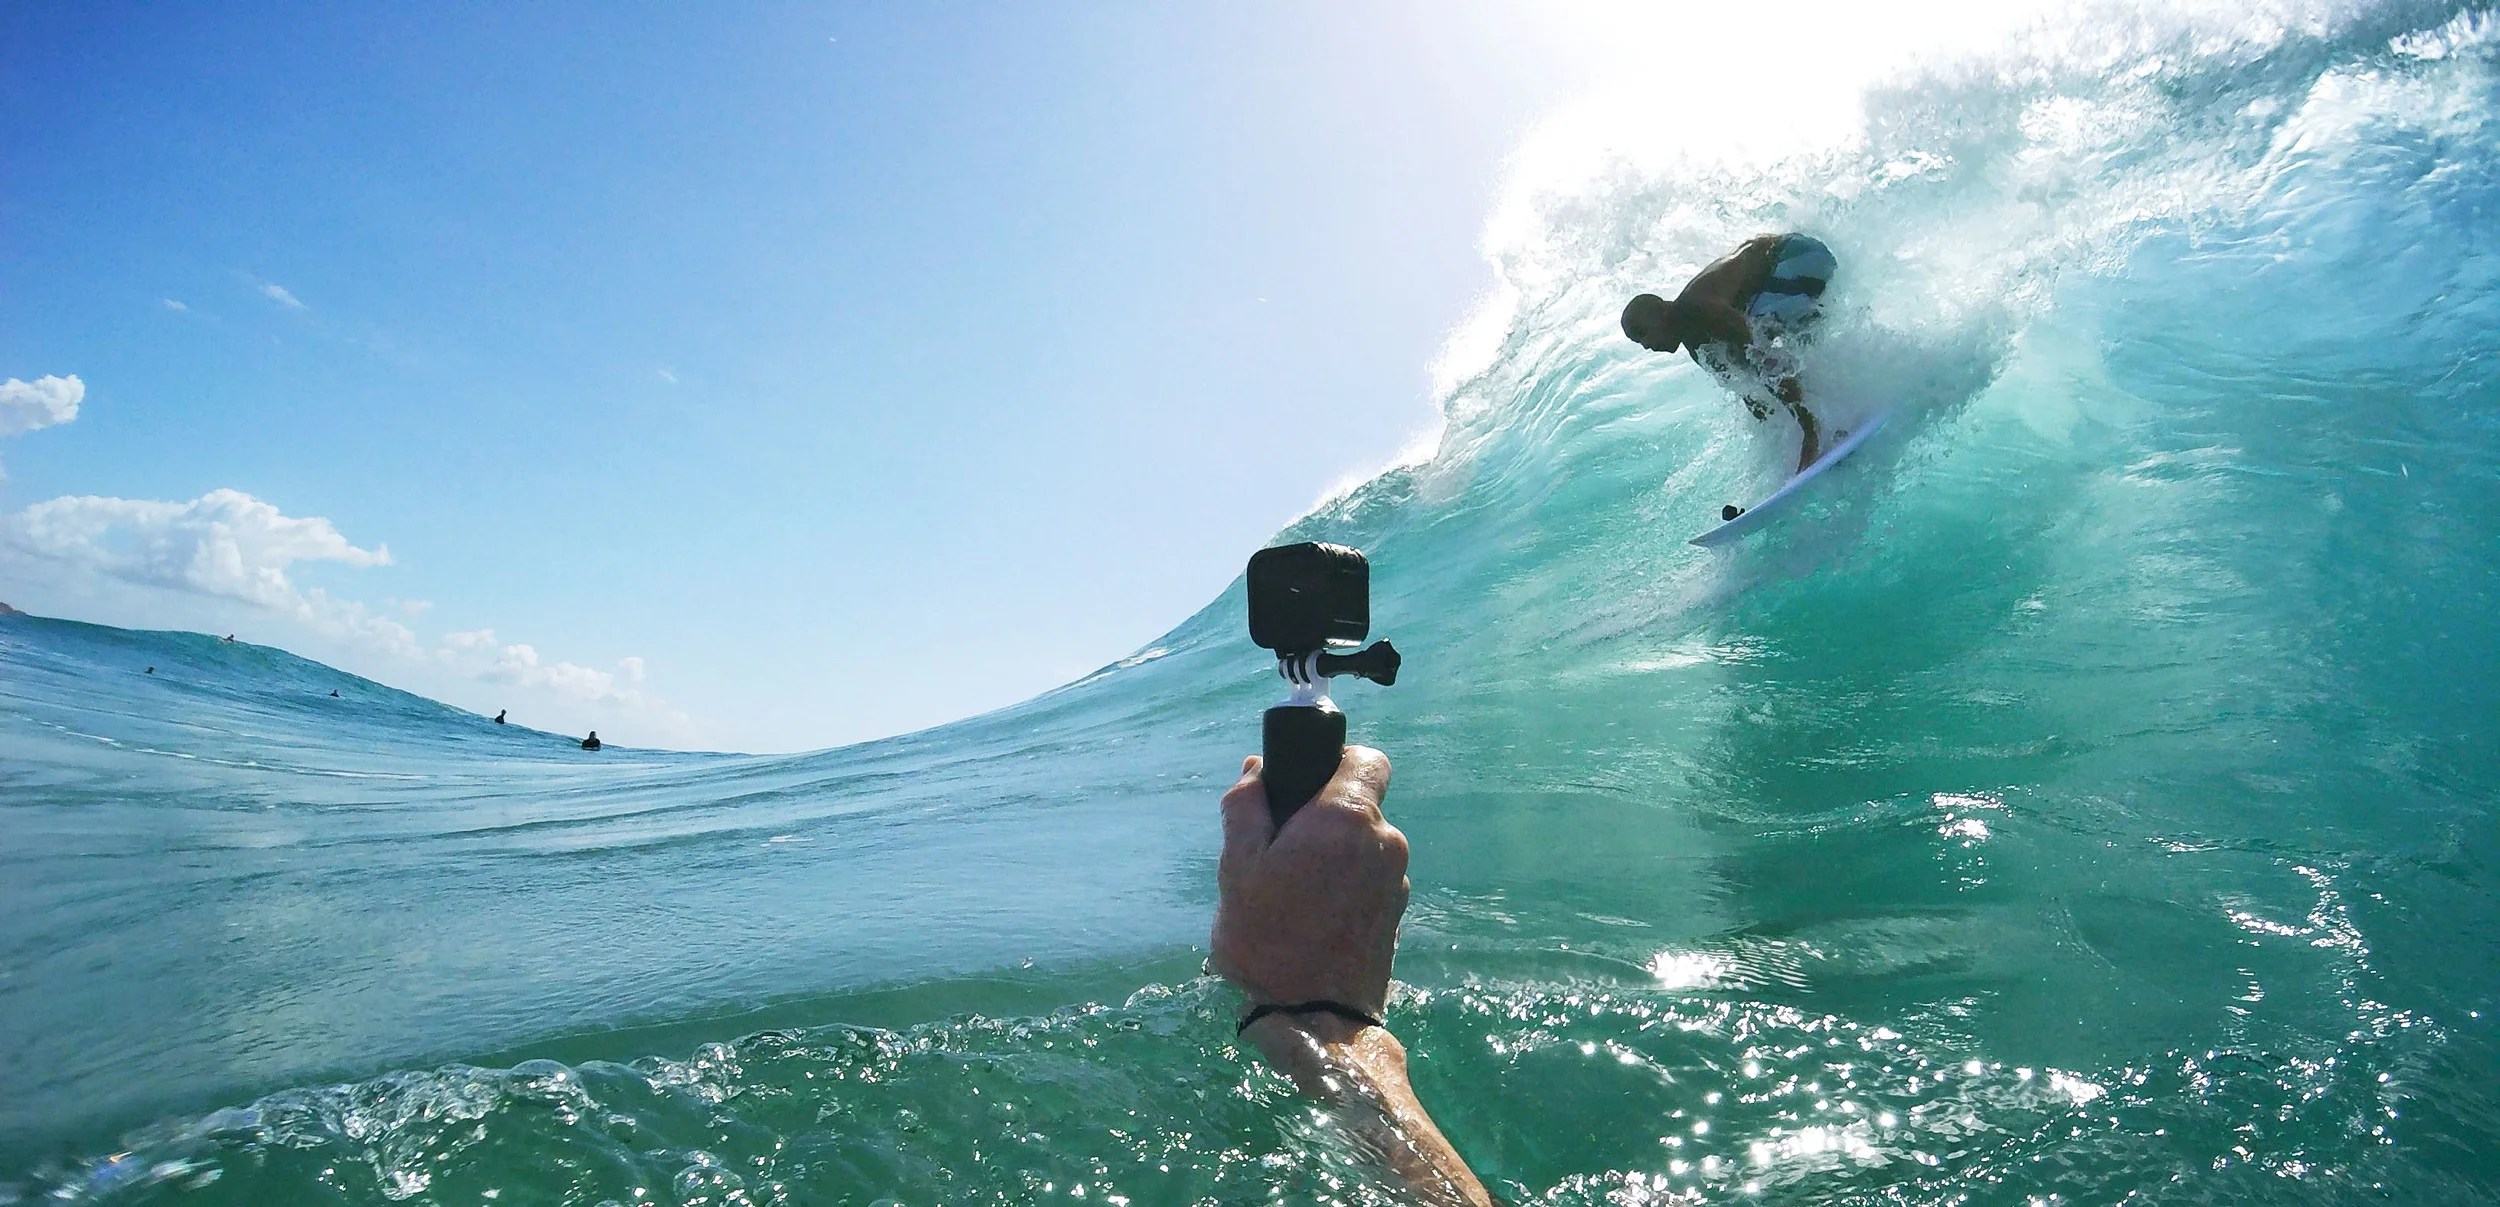
Figure 2
There are many unpredictable factors involved in a production, the biggest being weather and conditions, problems which are exacerbated by having a limited amount of shoot time - which we often do. One of the most difficult sports to shoot in a limited time frame is surfing; frequently and quickly changing conditions make surf productions very long and drawn-out. For our Session surf production, we spent 2 weeks chasing swells up and down the Gold Coast of Australia and then followed a swell to Indonesia for a week. Many days were spent traveling or waiting out bad weather, making it absolutely crucial that we were ready to strike when our windows hit. Here are 3 things that we implemented to make sure we were as efficient with our time as possible.

Figure 3 (shot by Kyle Camerer)
1. Shot lists Every crew that leaves on a launch production has compiled a very thorough shot list detailing exactly what shots are needed for the reel. This comes back to the idea of thinking about the end result and working backwards. Because we had a vision for the end product, we knew exactly what shots we wanted, making shooting as simple as checking boxes off of a list once we were on the ground. This sounds like a very simple or obvious concept, but if this practice is followed closely, it can have profound results on efficiency. *This is also the time to establish any common threads that we want to see appear across all productions. With the Session reel, we wanted to highlight the camera's POV (point of view) capabilities and well as its ability to fit into tight, interesting places (see figure 3) such as inside a bike wheel.
2. Packing the most efficient gear This is where I insert my shameless plug for the HERO4 Session. I was actually a skeptic when I first saw the camera. Leading up to the surf shoot, my biggest worries were battery life without a removable battery and lens fogging, especially being in humid environments. What I didn't realize is how much the battery would be spared by the fact that the camera turns off automatically when it's not recording. The advertised battery life is 2 hours, which in the case of surfing leads you to believe that you will get a couple hours in the water before your battery dies. In reality, our athletes were using their cameras for more than 6-7 hours at a time. I had packed 2 solar powered chargers for charging cameras on the boat during the day, neither of which I touched once. This saved me a lot of time and allowed me to focus on more important things rather than switching out batteries.
As far as fogging, we were in one of the most humid parts of the world, in and out of water all day, and did not have a single camera fog up on us. Which brings up an interesting point. If you are in a humid or underwater environment and shooting with a HERO4, you're workflow at the end of the day goes something like this: 1. Open the waterproof housing. 2. Take camera out 3. Pop card out. 4. Put old battery on charger. 5. Put new battery in. 6. Replace anti-fog strips. 7. Put new card in. 8. Clean waterproof housing. 9. Put camera back in housing. With the Session, your workflow is: 1. Pop card out. 2. Clean the lens. 3. Put new card in 4. Plug camera into charger. This is a very important advancement in efficiency that cannot be overstated. Removing 5 steps from the process of refreshing a camera can save hours of time while on production, making your team that much more nimble and stealthy.
3. Implement the 80/20 rule
Figure 4
When shooting under a time constraint for a specific purpose, it's important that you identify what the most critical moment of your story is, and start there. In other words, what is the 20% of the shoot that is going to produce 80% of your useable footage. Start by shooting that, and then worry everything else if there's time. For example, we had essentially 3 days to shoot the rock climbing footage. The climb we had picked for aesthetic purposes was Moonlight Buttress (see figure 4). The climb is a 10-pitch route that takes an average of 1.5 days to complete - the section that is the most dramatic on camera is the last 2-3 pitches.
Rather than have the climbers start at the bottom and hope that when they got to the top conditions would be good to shoot the final scene, we hiked up to the top before sunrise on the very first day to shoot the last scene, first. We knew going into the shoot that what we really needed for the reel was that moment of the girls 1500' over the valley finishing the climb. If we had only that scene, with no shots of them starting the climb, that would be much better than having them starting a climb that we didn't have them finishing. Shooting the final scene ended up taking an entire day and a half, and we had just enough time to get the other shots we needed at the bottom.

Figure 5
Formula #3 - Cutting Eight 30-second Commercials
Editing 8 storylines at once can be very overwhelming - important parts to each story can get lost in the shuffle if you aren't organized. An approach that we adopted for the Session launch, was to edit 8 separate 30-second "commercials" for each sport/storyline before bringing anything onto a master timeline. Before anything else, we sat down to screen and critique each commercial individually. Each commercial followed the same overarching structure that the actual reel was going to follow (see figure 6) *This structure was developed based on the flow of the music track.
Figure 6
Once we were happy with the progression of each "commercial", we brought the stories together onto one timeline - all of the establishing shots were put together at the beginning, all Action I shots grouped together after that, and so on. At this point in the process, we were a long way away from a finished product, but it's always very surprising how strong of a rough-cut you end up with just by following this procedure.
This is where the process truly becomes a giant puzzle. You have clumps put together that you know flow well chronologically, now it's a matter of shuffling them so that the pieces transition into one another in a smooth and stylistic way. This is where we start messing around with the "portals" that GoPro launch reels are famous for. A portal, or wipe, is an edit that happens when the lens is completely covered or obstructed by something - a lot times water, snow, and dirt offer good opportunities. The strongest portals are ones that transport you into a totally new environment. In Figure 7, you see where the actual cut happens in this particular portal. Technically you are cutting from black to white, which should be a jarring transition, but because the movement of the dirt splashing onto the lens has very similar properties to the water splashing off the lens, the transition appears smooth, almost as if there was no cut at all. (See Figure 8)
Figure 7

Figure 8
Another type of transition which can be very powerful is a cut that creates an implication of continued movement. In Figure 9, you see that the snowboarder is moving toward the camera (which is stationary). Just when he is about to hit the camera, we cut to a POV shot of the skydiver falling backwards - continuing the motion established by the snowboarder. When played at full speed, it almost feels like the snowboarder kicks the skydiver backwards. (see figure 10)
Figure 9
Figure 10
Once all of the pieces are put in place, the final step is to comb through every single shot and make sure that there isn't a better shot to replace it. The structure should be 95% locked in at this point, but a lot of times we will discover A+ shots at the last minute and end up substituting them. One helpful step that we added during the Session reel, was to color code and separate each story onto different lines on our timeline.
Figure 9
For example (see figure 9), all of the surf shots were labelled orange and placed on line 1, snow shots labelled pink and placed on line 2, etc. What this helps to do is highlight any spacing issues - meaning if two sections from the same story were too close to one another we might consider moving them apart. Conversely, if there is a big 3 minute gap in between two parts of the same story, we might think about pushing them closer together so the audience doesn't lose track of that thread. Inconsistencies will become very apparent when you lay your timeline out like this.
I hope that some of these insights offer an interesting window into the creation of a GoPro launch reel. These launch videos are pretty unique in structure and therefore some of these principles only apply to such formats, but I hope there are some useful 'lessons-learned' in here for you to pull from and apply to other types of filmmaking.
- Ryan Truettner | Senior Production Artist @ GoPro